Create Windows 11 Bootable USB with Rufus: Your Step-by-Step Guide
Create Windows 11 bootable USB with Rufus.
Ever wondered how to quickly create a Windows 11 bootable USB with Rufus? Whether you’re installing Windows 11 on a new PC or upgrading an old one, this guide has got you covered.
Here’s the deal: Rufus is a powerful tool, and it’s super easy to use—but only if you know what you’re doing.
By the end of this post, you’ll learn how to use Rufus like a pro to create a bootable USB drive for Windows 11 installation. Ready to save hours of frustration? Let’s dive in!
What is Rufus and Why Use It?
Rufus is a free, lightweight USB creation tool designed for creating bootable drives. Unlike some clunky tools, Rufus stands out because it’s fast, reliable, and works seamlessly with Windows 11 ISO files.
Here’s why you should choose Rufus:
- Supports Windows 11 hardware requirements
- Can bypass Secure Boot and TPM 2.0 for unsupported PCs
- Creates a bootable USB drive in minutes
- Works with multiple operating systems, not just Windows
If you’re serious about installing Windows 11, Rufus is your go-to tool. If you’re working with Windows 10, check out this guide on creating a bootable USB for Windows 10.
What You Need to Create a Windows 11 Bootable USB
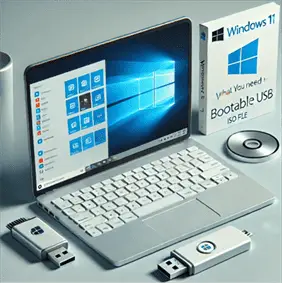
Before diving in, gather these essentials:
- A USB flash drive (at least 8GB)
- A Windows 11 ISO file
- Rufus (downloaded and ready to go)
- A PC running Windows (to set everything up)
Make sure your USB flash drive is empty or has no critical data. Rufus will wipe it clean during the process. Alternatively, you can learn how to create a Windows Recovery USB if system repair is your primary goal.
How to Download Rufus
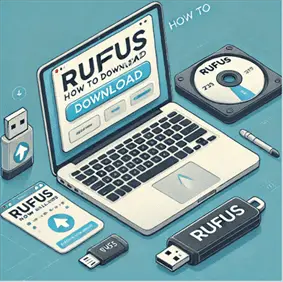
Downloading Rufus is a breeze:
- Visit the official Rufus website.
- Click on Download the latest version.
- Save the executable file to your computer.
That’s it! No installation is required because Rufus is a portable program. For step-by-step instructions, check out this guide on downloading Rufus for Windows 11.
How to Get the Windows 11 ISO File
You’ll need the official Windows 11 ISO file from Microsoft:
- Go to the Windows 11 download page.
- Select Download Windows 11 Disk Image (ISO).
- Choose your Windows 11 version and click Download.
- Pick your preferred language and confirm.
- Save the ISO file to your computer.
Step-by-Step: Create a Windows 11 Bootable USB with Rufus
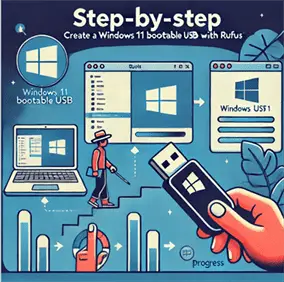
Here comes the fun part. Follow these steps to create a bootable USB drive using Rufus:
- Open Rufus
- Double-click the Rufus executable to launch it.
- Insert Your USB Drive
- Plug in your USB flash drive.
- Rufus will automatically detect the drive you want to use.
- Select the Windows 11 ISO File
- Click the Select button in Rufus.
- Browse for the Windows 11 ISO file you downloaded earlier.
- Configure Rufus Settings
- Set Partition scheme to GPT (for modern UEFI systems).
- File system: NTFS.
- Leave other settings at default unless you’re working with unsupported hardware.
- Start the Process
- Click Start to begin creating your bootable USB.
- Wait a few minutes for Rufus to finish.
Congratulations! You now have a Windows 11 bootable USB drive ready to use.
Common Problems and How to Fix Them
Sometimes, things don’t go smoothly. Here’s how to troubleshoot:
- Rufus doesn’t detect my USB drive: Try unplugging and reinserting it or using another USB port.
- Error writing ISO to USB: Make sure your ISO file isn’t corrupted. Re-download it if needed.
- Bootable USB doesn’t work: Check your BIOS/UEFI settings and ensure USB boot is enabled.
For issues related to system files, you can also repair Windows 10 using Command Prompt.
Installing Windows 11 from a Bootable USB
Once your bootable USB is ready, follow these steps:
- Insert the USB Drive
- Plug the bootable USB into the target PC.
- Access BIOS/UEFI Settings
- Restart your computer and press the BIOS key (usually F2, F12, or DEL).
- Set the USB drive as the first boot option.
- Start Windows 11 Installation
- Save changes and exit the BIOS.
- Follow the on-screen instructions to install Windows 11.
Pro tip: Choose “Custom Installation” if you want to start fresh or manage partitions manually. After installing Windows 11, don’t forget to protect your system with one of the best free antivirus options for Windows 11.
Can You Install Windows 11 on Unsupported Hardware?
Yes, but proceed with caution. Rufus offers options to bypass Secure Boot and TPM 2.0 requirements.
Here’s how:
- In Rufus, enable the option to bypass Windows 11 hardware requirements.
- This is perfect for older PCs that don’t meet Microsoft’s strict requirements.
Looking for a detailed guide? Here’s how to install Windows 11 on unsupported hardware.
Remember, unsupported hardware might not receive updates, so weigh your options carefully.
Frequently Asked Questions
1. Is Rufus free?
Yes, Rufus is completely free and open-source.
2. Can I use Rufus on a Mac?
No, Rufus is Windows-only. Use alternatives like BalenaEtcher for macOS.
3. What’s the minimum USB size for Windows 11?
An 8GB USB flash drive is recommended.
4. How long does it take to create a bootable USB with Rufus?
It usually takes 5-10 minutes, depending on your USB speed.
Key Points to Remember
- Rufus is a lightweight tool for creating bootable USB drives.
- You’ll need a Windows 11 ISO file and an empty USB flash drive.
- Rufus can bypass hardware requirements, making it a great choice for unsupported PCs.
- Always check your BIOS/UEFI settings to boot from USB.
Creating a Windows 11 bootable USB with Rufus doesn’t have to be complicated. With this guide, you’re just minutes away from installing Windows 11 like a pro.
FAQs – Create Windows 11 bootable USB with Rufus
Can Rufus make Windows 11 bootable USB?
Yes, Rufus can make a Windows 11 bootable USB with ease. According to the official Rufus website, the tool supports creating bootable USB drives for Windows 11 using ISO files. Additionally, Rufus offers advanced features to bypass Windows 11’s Secure Boot and TPM 2.0 requirements for systems that don’t meet Microsoft’s strict hardware standards.
How do I create a custom Windows 11 bootable USB drive?
Creating a custom Windows 11 bootable USB drive involves these steps:
Download Rufus from the official site and run it.
Download the Windows 11 ISO file from the Microsoft Download Center.
Open Rufus and:
Select your USB flash drive.
Choose the Windows 11 ISO file.
Modify the partition scheme and file system if needed.
Enable any advanced options like bypassing Secure Boot, if required.
Click Start and wait for Rufus to create the bootable USB.
For more detailed steps, refer to Microsoft’s official installation instructions.
How do you copy Windows 11 to USB and make it bootable?
To copy Windows 11 to a USB and make it bootable, follow these steps:
Download Windows 11 ISO: Get it directly from Microsoft’s website.
Install Rufus: This tool simplifies creating bootable USB drives. Download it here.
Set Up Rufus:
Open Rufus and select your USB drive.
Use the “Select” button to locate the Windows 11 ISO file.
Adjust options like partition scheme (GPT) and file system (NTFS).
Click Start to initiate the process. Rufus will copy the Windows 11 files and make the USB bootable.
How to use Rufus to create a bootable USB?
Using Rufus to create a bootable USB is straightforward:
Download Rufus: Visit rufus.ie to get the latest version.
Launch Rufus: No installation needed as it’s a portable program.
Insert a USB Drive: Connect a USB flash drive (minimum 8GB) to your PC.
Load ISO File: Click on the “Select” button to choose the Windows 11 ISO.
Adjust Settings:
Select partition scheme: GPT (for UEFI systems).
File system: NTFS.
Start the Process: Click “Start” and let Rufus format the USB and create the bootable drive.
For detailed troubleshooting and advanced features, check the Rufus FAQ.


