How to Disable Network Discovery in Windows 10: A Step-by-Step Guide
Disable network discovery in Windows 10
If you’re tired of your Windows 10 PC being discoverable to other devices on a network, you’re not alone. Network discovery can expose your computer to unnecessary risks if you’re on a public or unsecured network. But don’t worry—learning how to disable it is simpler than you might think.
Want to protect your PC, stop unwanted devices from seeing it, and improve your privacy? Keep reading to discover how disabling network discovery in Windows can help you regain control.
Why Would You Disable Network Discovery?
Network discovery is a feature in Windows 10 that allows your computer to find other devices and let them find you on a network. While this can be useful for file sharing and connecting printers, it’s a double-edged sword.
Here are common reasons to turn it off:
- Security risks: Exposing your PC on public networks can make it vulnerable to hackers.
- Privacy concerns: Prevent other users from discovering your PC.
- Unnecessary access: Keep unauthorized users from accessing shared files or printers.
Disabling network discovery helps mitigate these risks by keeping your PC more secure and private.
What Is Network Discovery?
Network discovery is a Windows feature that determines whether your computer can see other devices on the network and whether they can see you. It’s crucial for sharing files, printers, and other network devices. Learn more about file sharing in Windows 10 here.
Here’s how it works:
- When enabled, your PC actively searches for other computers and devices on the network.
- When disabled, it becomes invisible, enhancing privacy and security.
Should You Disable Network Discovery in Windows 10?
Disabling network discovery in Windows 10 isn’t always necessary. But it’s a must in these scenarios:
- You’re connected to a public network (e.g., coffee shops, airports).
- Your firewall settings don’t block incoming connections effectively.
- You want to prevent other computers on the network from discovering your PC.
For private networks, you can keep it enabled if you need to share files or printers with trusted devices.
How to Check Your Network Profile in Windows 10
Before disabling network discovery, confirm your network profile type. Here’s how:
- Open Settings > Network & Internet.
- Click Wi-Fi or Ethernet, depending on your connection.
- Select your connected network and check if it’s set to Public or Private. Explore advanced Run command options.
Disabling Network Discovery Through Control Panel

The Control Panel offers a straightforward way to manage network discovery settings:
- Press
Win + R, typecontrol, and hit Enter. Master Command Prompt commands here. - Navigate to Network and Sharing Center.
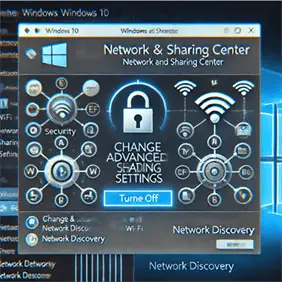
- Click Change advanced sharing settings from the side menu.
- Under Network Discovery, select Turn off network discovery.
- Click Save changes.
Using Advanced Sharing Settings
The Advanced Sharing Settings page allows granular control over network discovery and related features:
- Go to Network and Sharing Center.
- Click Advanced Sharing Settings.
- Expand the profile you want to configure (Public or Private).
- Toggle Turn off network discovery and uncheck Turn on automatic setup of network-connected devices.
- Save your changes. Clearing cache can help resolve network issues.
Turning Off Network Discovery via Windows Settings
Prefer the modern Windows Settings interface? Here’s what to do:
- Open Settings > Network & Internet.
- Select Wi-Fi or Ethernet.
- Under Network Profile, choose Public to automatically disable network discovery.
How to Use Group Policy to Disable Network Discovery
For system administrators, Group Policy is a powerful tool to control network settings:
- Press
Win + R, typegpedit.msc, and hit Enter. - Navigate to Computer Configuration > Administrative Templates > Network > Network Connections.
- Locate and configure policies to disable network discovery. Learn more about Group Policy Objects.
- Restart your PC for changes to take effect.
Disabling Network Discovery via Command Prompt
If you’re tech-savvy, use the Command Prompt for a faster approach:
- Open Command Prompt as an admin.
- Run the following commands:
netsh advfirewall firewall set rule group="Network Discovery" new enable=No - Verify the changes with:
netsh advfirewall firewall show rule name=allExplore Command Prompt troubleshooting tips.
How to Verify If Network Discovery Is Disabled
To confirm network discovery is off:
- Return to Network and Sharing Center.
- Open Advanced Sharing Settings.
- Ensure Turn off network discovery is selected.
FAQs About Disabling Network Discovery in Windows 10
Q: Does disabling network discovery improve security?
Yes. It prevents unauthorized devices from detecting your PC.
Q: Will I lose access to shared files and printers?
Yes, unless you manually enable these features for specific network profiles.
Q: Can I disable network discovery for specific profiles only?
Absolutely. Use Advanced Sharing Settings to configure Public or Private profiles separately.
Key Takeaways
- Network discovery affects whether your computer is visible to other devices on a network.
- Use the Control Panel, Windows Settings, or Command Prompt to turn it off.
- Disable it on public networks to enhance security and privacy.
- Check your network profile type before making changes.
- Advanced users can leverage Group Policy for granular control.
By following these steps, you’ll keep your PC secure and private, whether at home or on the go.
FAQs – Disable Network Discovery in Windows 10
How do I turn off network sharing in Windows 10?
Open Control Panel.
Go to Network and Sharing Center > Change advanced sharing settings.
Under the relevant network profile (Private or Public), choose Turn off network discovery and Turn off file and printer sharing.
Save your changes.
Source: Microsoft Support.
How do I turn off printer discovery in Windows 10?

Open Control Panel.
Go to Devices and Printers.
Right-click your printer and select Remove device to stop sharing it.
Alternatively, go to Network and Sharing Center > Change advanced sharing settings and disable File and Printer Sharing.
Source: Microsoft Support.
How do I turn off network access in Windows 10?

Open Control Panel > Network and Sharing Center.
Click Change adapter settings.
Right-click the network connection you want to disable and select Disable.
Alternatively, use Device Manager to disable network adapters.
Source: Microsoft Documentation.
How do I disable network drive in Windows 10?
Open File Explorer.
Go to This PC and locate the network drive you want to disable.
Right-click the network drive and choose Disconnect.
To prevent automatic reconnection, unmap the drive from the Map network drive menu.
Source: Microsoft Documentation.


