How to Set Up Signature in Outlook Desktop
If you’re not familiar with How to Set Up Signature in Outlook Desktop or How To Change Signature In Outlook 365, this article gives you an easy step through guide.
Why would you want to create an email signature? you might have your own reasons but in the main it would be to save you time from typing information that doesn’t change frequently and also it helps you build a brand.
The fact you’re here reading this means you might have a question like “How Do I Set Up Signature In Outlook Email” or change your outlook signature. Read on to choose your preferred way.
How to Set Up Signature In Outlook Desktop

- Select Home Tab if it’s not already selected.
- Click on “New Email” to create new email.
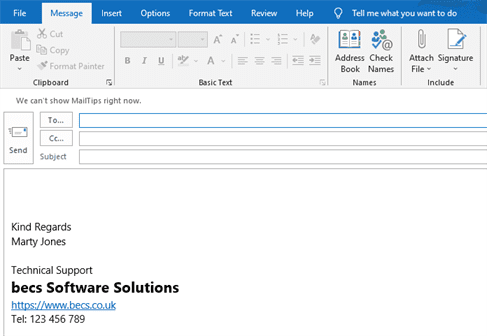
- Click on “Signature” and then,
- Click on “Signatures” to access signatures and stationery.
- Click “New” for new signature and give it a Name. (In this case “Example Signature”)
- Edit your new signature.
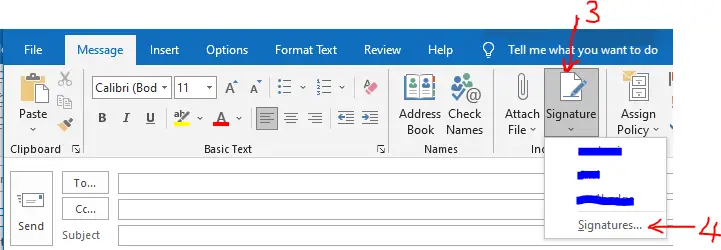
- Select newly named signature in this case “Example Signature“.
- Start adding your signature details similar to what you can see in the image below.
- Format your signature to your liking.
- Click “Save” once you’re done entering signature details.
- If your Outlook Profile has more than one email account, choose the email account to associate the “Example Signature” with.
- If you want “Example Signature” to be inserted automatically when you create a new email message, select it under New messages.
- You might have different signatures for Replies or Forwards – so select them here.
- Click “OK” when you’re done.

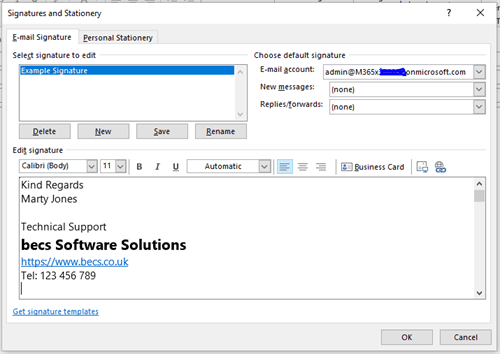
Testing your created Outlook Signature
- Click on New Email from the Home Tab
- If you configured your signature to be inserted automatically with a new message you would see the new message already pre-populated with the outlook signature.
How to Change Signature in Outlook Windows 10
They’re many ways to access Outlook Signatures
- Home > New email > Signature > Signatures
- File > Options > Mail > Signatures
- Search for “Signature” > Signature > Signatures (see pic below)

- Select the signature you want to change.
- Make the text changes that you want and then Click “Save“.
- If you wish to change default settings – email account, New messages and Replies & Forwards – do that and then click OK to save & exit.
How To Change Signature In Outlook 365
- Click “New Email” from the Home Tab
- If you have already defined the default signature for this email account, it will be inserted automatically.
- Put your curser in the body of the new email message.
- Click on Insert Tab > Table > 2 x 1 table.
- Click in Left Column of table.
- Click on Insert Picture to insert your picture, logo or any graphic of your choice.
- Resize Image by dragging it to a smaller size if it’s too big.
- Resize the column also by dragging the middle border leftwards (<–).
- Copy the signature details you want to change that would be at the bottom of your new message.
- Paste the signature details into the Right Column.
- Make the changes you want.
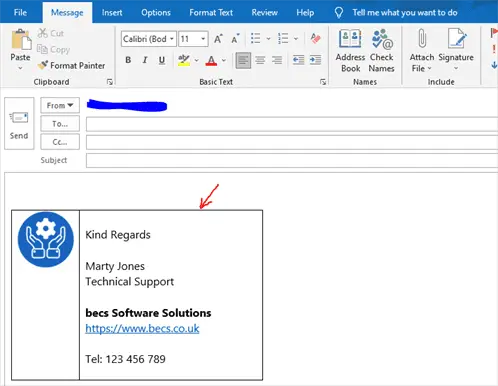
- Next remove the table borders.
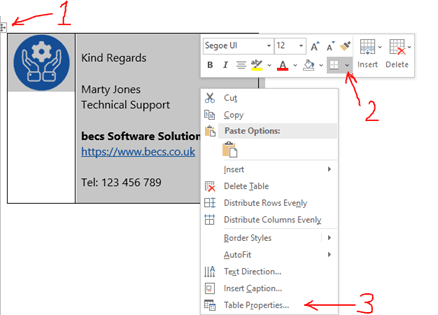
- Click on the table icon (top left as shown in picture) to select the 2 column table. (Position 1 in picture below)
- Right-Click the selected table.
- Either Click on the border icon on selected context formatting and choose No Border. (Position 2 in picture below)
- OR Click Table properties > Borders and Shading > No Border > Click OK. (Position 3 in picture below)
- Copy both the image in Left Column and Text Details in right Column.
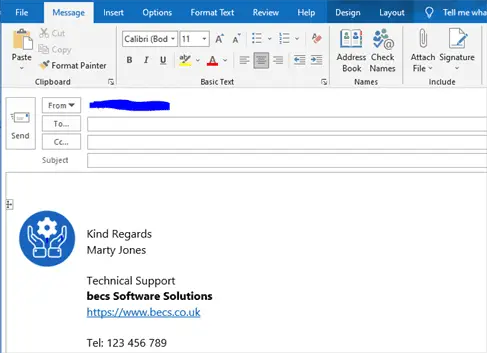
- Click “Signature” > “Signatures” to access signatures and then select the Signature you’re changing.
- Select all details in the edit section and delete before pasting the new details.
- Click “Save” to save your new signature and that’s it you’ve changed your signature.
Related Posts: Microsoft Outlook Calendar Tips and Tricks
