Install Windows 11 on unsupported hardware – (A step-by-step guide)
Install Windows 11 on unsupported hardware. In this blog post, I aim to provide computer users with tips and tricks on how to install Windows 11 on unsupported hardware.
The release of Windows 11 has left many users excited to upgrade their systems and enjoy the new features and enhancements. However, not all computers meet the system requirements for Windows 11, which leaves out some users who have unsupported hardware.
But fear not, as there are several methods to upgrade to Windows 11 on unsupported hardware. In this post, I will guide you through the different options available to upgrade to Windows 11 on unsupported hardware. I will also highlight the benefits and risks of each method.
Whether you want to upgrade to Windows 11 on unsupported CPU, install Windows 11 on unsupported hardware from USB, or upgrade to Windows 11 on unsupported hardware using ISO, this post has got you covered. Additionally, I will discuss how to install Windows 11 on unsupported PC without data loss and the different methods to upgrade from Windows 10 to Windows 11 on unsupported hardware.
So, if you’re considering installing Windows 11 on unsupported hardware or need guidance on how to do so, keep reading to learn more.
I. Install Windows 11 on unsupported hardware – Introduction
In this article, I will guide you on how to upgrade to Windows 11 on unsupported hardware. With the release of Windows 11, many users are eager to upgrade their systems and take advantage of the latest features and improvements. However, not all computers meet the system requirements for Windows 11, which leaves some users with unsupported hardware.
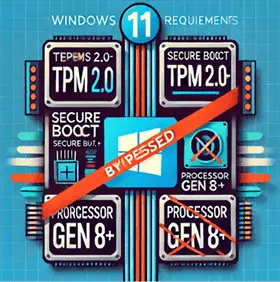
To upgrade to Windows 11, your computer must meet certain hardware requirements, including a compatible CPU, RAM, storage, and graphics card. Microsoft has published a list of minimum system requirements for Windows 11, which includes a compatible 64-bit processor, 4 GB of RAM, 64 GB of storage, and DirectX 12 compatible graphics.
However, many older computers or devices may not meet these requirements, which means they are not officially supported to run Windows 11. This can be frustrating for users who want to take advantage of the latest operating system, but cannot upgrade due to unsupported hardware.
In this article, I will explain how to install Windows 11 on unsupported hardware by using different methods, including upgrading to Windows 11 on unsupported CPU, installing Windows 11 on unsupported hardware from USB, upgrading to Windows 11 on unsupported hardware using ISO, upgrading to Windows 11 on unsupported hardware with Rufus, upgrading to Windows 11 on unsupported hardware using the Registry method, and upgrading from Windows 10 to Windows 11 on unsupported hardware.
By the end of this article, you will have a better understanding of the benefits and risks of upgrading to Windows 11 on unsupported hardware and be equipped with the knowledge to upgrade your system to Windows 11 even if it is not officially supported.
II. Upgrade to Windows 11 on unsupported hardware
Upgrading to Windows 11 on unsupported hardware may seem like a daunting task, but there are several methods to achieve it. In this section, we will discuss the different methods to install Windows 11 on unsupported hardware.
Upgrading to Windows 11 on unsupported CPU:
If your CPU is not compatible with Windows 11, there is a chance that it may still work with the operating system. You can use third-party tools such as “WhyNotWin11” to check if your CPU is compatible and use the “compatibility bypass” method to upgrade to Windows 11 on unsupported CPU.
Installing Windows 11 on unsupported hardware from USB:
This method involves creating a bootable USB drive with the Windows 11 installation files and using it to install the operating system on unsupported hardware.
Upgrading to Windows 11 on unsupported hardware using ISO:
This method involves downloading the Windows 11 ISO file and using it to upgrade your system. You can use tools such as Rufus or the Windows Media Creation Tool to create a bootable USB drive or DVD.
Install Windows 11 on unsupported hardware Rufus:
Rufus is a third-party tool that can create bootable USB drives. You can use it to create a bootable USB drive with the Windows 11 installation files and use it to upgrade your system.
Upgrading to Windows 11 on unsupported hardware Registry method:
This method involves modifying the Windows Registry to bypass the compatibility check and install Windows 11 on unsupported hardware.
Each of these methods has its own benefits and risks. The benefits of upgrading to Windows 11 on unsupported hardware include access to the latest features and security improvements, while the risks include possible compatibility issues and the potential for data loss during the upgrade process.
In the next section, we will delve into the benefits and risks of upgrading to Windows 11 on unsupported hardware in more detail.
III. Upgrade to Windows 11 on unsupported CPU
If your CPU is not compatible with Windows 11, you may still be able to upgrade to the new operating system using the compatibility bypass method. In this section, we will explain the different methods to upgrade to Windows 11 on unsupported CPU.
Compatibility bypass method:
This method involves using a third-party tool, such as “WhyNotWin11,” to check if your CPU is compatible with Windows 11. If your CPU is not compatible, the tool can help you bypass the compatibility check during the installation process.
Editing the registry:
Another method involves editing the Windows Registry to bypass the compatibility check. This method requires some technical knowledge, and if not done correctly, can cause issues with your system.
Upgrading to a compatible CPU:
If your CPU is not compatible with Windows 11, you may consider upgrading to a compatible CPU. This may be a costly option, but it ensures that your system meets the necessary requirements for Windows 11.
When upgrading to Windows 11 on unsupported CPU, it is important to consider the benefits and risks of the process. The benefits include access to the latest features and improvements of the operating system, while the risks include possible compatibility issues and potential system instability.
It is also important to note that using third-party tools to bypass the compatibility check can have negative consequences, such as decreased system performance, security vulnerabilities, and data loss. Therefore, it is crucial to understand the risks and potential consequences before attempting to upgrade to Windows 11 on unsupported CPU.
IV. Upgrade to Windows 11 on unsupported hardware – The easiest way
If you are looking for the easiest way to upgrade to Windows 11 on unsupported hardware, the compatibility bypass method is the best option. In this section, we will provide a step-by-step guide on how to upgrade to Windows 11 on unsupported hardware using the easiest method.
Step 1: Download the “WhyNotWin11” tool.
The first step is to download the “WhyNotWin11” tool from the internet. This tool checks if your hardware meets the minimum system requirements for Windows 11.
Step 2: Run the “WhyNotWin11” tool.
Once you have downloaded the tool, run it and wait for it to complete the compatibility check. If your hardware does not meet the minimum system requirements for Windows 11, the tool will indicate that your system is not compatible.
Step 3: Download the Windows 11 ISO file.
If your system is not compatible, you can still install Windows 11 on unsupported hardware by downloading the Windows 11 ISO file from Microsoft’s website.
Step 4: Use Rufus to create a bootable USB drive.
Use Rufus or any other tool to create a bootable USB drive with the Windows 11 ISO file.
Step 5: Run the Windows 11 setup.
Insert the bootable USB drive and run the Windows 11 setup. During the installation process, you will be prompted to choose between a clean install or an upgrade. Choose the upgrade option to keep your existing files and applications.
Step 6: Follow the on-screen instructions.
Follow the on-screen instructions to complete the installation process. Once the installation is complete, you will be able to use Windows 11 on your unsupported hardware.
The benefits of using the compatibility bypass method include a straightforward installation process and the ability to upgrade to Windows 11 on unsupported hardware without much technical knowledge. However, the risks include possible compatibility issues and the potential for data loss during the upgrade process.
It is important to be aware that using third-party tools to bypass the compatibility check can have negative consequences, such as decreased system performance, security vulnerabilities, and data loss. Therefore, it is crucial to understand the risks and potential consequences before attempting to install Windows 11 on unsupported hardware using this method.
V. Upgrade to Windows 11 on unsupported hardware from USB
If you want to upgrade to Windows 11 on unsupported hardware using a USB drive, this section will guide you through the process. This method involves creating a bootable USB drive with the Windows 11 installation files and using it to upgrade your system.
Step 1: Download the Windows 11 ISO file.
The first step is to download the Windows 11 ISO file from Microsoft’s website. Ensure that you download the correct version of Windows 11 that matches your system’s architecture (64-bit).
Step 2: Create a bootable USB drive.
Next, you will need to create a bootable USB drive with the Windows 11 ISO file. You can use tools such as Rufus or the Windows Media Creation Tool to create a bootable USB drive.
Step 3: Insert the bootable USB drive and restart your computer.
Insert the bootable USB drive into your computer and restart your system. Your system should automatically boot from the USB drive.
Step 4: Follow the on-screen instructions.
Follow the on-screen instructions to complete the installation process. During the installation process, you will be prompted to choose between a clean install or an upgrade. Choose the upgrade option to keep your existing files and applications.
Step 5: Complete the installation.
Once the installation is complete, you can remove the USB drive and restart your system. You will then be able to use Windows 11 on your unsupported hardware.
The benefits of installing Windows 11 on unsupported hardware from USB include the ability to perform the upgrade without an internet connection and the ability to keep your existing files and applications. However, the risks include possible compatibility issues and the potential for data loss during the upgrade process.
It is important to note that before attempting to install Windows 11 on unsupported hardware from USB, you should ensure that your system meets the minimum system requirements for Windows 11. Additionally, you should create a backup of your important files and data to prevent data loss in case of any issues during the upgrade process.
VI. Install Windows 11 on unsupported hardware ISO
Another method to upgrade to Windows 11 on unsupported hardware is by using an ISO file. In this section, we will provide a step-by-step guide on how to upgrade to Windows 11 on unsupported hardware using ISO.
Step 1: Download the Windows 11 ISO file.
The first step is to download the Windows 11 ISO file from Microsoft’s website. Ensure that you download the correct version of Windows 11 that matches your system’s architecture (64-bit).
Step 2: Create a bootable USB drive.
You will need to create a bootable USB drive with the Windows 11 ISO file. You can use tools such as Rufus or the Windows Media Creation Tool to create a bootable USB drive.
Step 3: Insert the bootable USB drive and restart your computer.
Insert the bootable USB drive into your computer and restart your system. Your system should automatically boot from the USB drive.
Step 4: Follow the on-screen instructions.
Follow the on-screen instructions to complete the installation process. During the installation process, you will be prompted to choose between a clean install or an upgrade. Choose the upgrade option to keep your existing files and applications.
Step 5: Complete the installation.
Once the installation is complete, you can remove the USB drive and restart your system. You will then be able to use Windows 11 on your unsupported hardware.
The benefits of upgrading to Windows 11 on unsupported hardware using ISO include the ability to perform a clean install of the operating system and the ability to customize the installation process. However, the risks include possible compatibility issues and the potential for data loss during the upgrade process.
It is important to know that before attempting to upgrade to Windows 11 on unsupported hardware using ISO, you should ensure that your system meets the minimum system requirements for Windows 11. Additionally, you should create a backup of your important files and data to prevent data loss in case of any issues during the upgrade process.
VII. Install Windows 11 on unsupported hardware Rufus
Rufus is a third-party tool that can create bootable USB drives, making it a convenient option to upgrade to Windows 11 on unsupported hardware. In this section, we will provide a step-by-step guide on how to upgrade to Windows 11 on unsupported hardware using Rufus.
Step 1: Download the Windows 11 ISO file.
The first step is to download the Windows 11 ISO file from Microsoft’s website. Ensure that you download the correct version of Windows 11 that matches your system’s architecture (64-bit).
Step 2: Download Rufus.
Download Rufus from the official website.
Step 3: Create a bootable USB drive using Rufus.
Launch Rufus and select the Windows 11 ISO file. Choose the appropriate settings, including partition scheme, file system, and cluster size, and then click “Start” to create a bootable USB drive.
Step 4: Insert the bootable USB drive and restart your computer.
Insert the bootable USB drive into your computer and restart your system. Your system should automatically boot from the USB drive.
Step 5: Follow the on-screen instructions.
Follow the on-screen instructions to complete the installation process. During the installation process, you will be prompted to choose between a clean install or an upgrade. Choose the upgrade option to keep your existing files and applications.
Step 6: Complete the installation.
Once the installation is complete, you can remove the USB drive and restart your system. You will then be able to use Windows 11 on your unsupported hardware.
The benefits of upgrading to Windows 11 on unsupported hardware using Rufus include the ability to create a bootable USB drive with ease and the flexibility to customize the installation process. However, the risks include possible compatibility issues and the potential for data loss during the upgrade process.
It is important to note that before attempting to upgrade to Windows 11 on unsupported hardware using Rufus, you should ensure that your system meets the minimum system requirements for Windows 11. Additionally, you should create a backup of your important files and data to prevent data loss in case of any issues during the upgrade process.
VIII. Install Windows 11 on unsupported hardware Registry method
Another method to upgrade to Windows 11 on unsupported hardware is by editing the Windows Registry. This method involves bypassing the system compatibility check by making changes to the Windows Registry. In this section, we will provide a step-by-step guide on how to upgrade to Windows 11 on unsupported hardware using the Registry method.
Step 1: Backup your registry.
Before making changes to the Windows Registry, it is important to create a backup to prevent any potential data loss. To do this, open the Registry Editor and select “Export” from the “File” menu.
Step 2: Open the Registry Editor.
Open the Registry Editor by typing “regedit” in the Run dialog box (Windows key + R).
Step 3: Navigate to the Registry key.
Navigate to the following Registry key: HKEY_LOCAL_MACHINE\SYSTEM\Setup\MoSetup
Step 4: Create a new DWORD value.
Create a new DWORD value by right-clicking on an empty space in the right pane and selecting “New” -> “DWORD (32-bit) Value”. Name the new value “AllowUpgradesWithUnsupportedTPMOrCPU” (without quotes).
Step 5: Set the value data.
Double-click on the newly created value and set the value data to “1”.
Step 6: Close the Registry Editor and restart your computer.
Close the Registry Editor and restart your computer.
Step 7: Download the Windows 11 ISO file.
Download the Windows 11 ISO file from Microsoft’s website.
Step 8: Create a bootable USB drive.
Use Rufus or any other tool to create a bootable USB drive with the Windows 11 ISO file.
Step 9: Run the Windows 11 setup.
Insert the bootable USB drive and run the Windows 11 setup. During the installation process, you will be prompted to choose between a clean install or an upgrade. Choose the upgrade option to keep your existing files and applications.
Step 10: Follow the on-screen instructions.
Follow the on-screen instructions to complete the installation process. Once the installation is complete, you will be able to use Windows 11 on your unsupported hardware.
The benefits of upgrading to Windows 11 on unsupported hardware using the Registry method include the ability to bypass the compatibility check without using third-party tools. However, the risks include possible compatibility issues and the potential for system instability.
It is important to note that editing the Windows Registry can be risky and may cause issues with your system if not done correctly. Therefore, it is crucial to understand the risks and potential consequences before attempting to install Windows 11 on unsupported hardware using this method. Additionally, you should create a backup of your important files and data to prevent data loss in case of any issues during the upgrade process.
IX. How to install Windows 11 on unsupported PC without data loss
Upgrading to Windows 11 on unsupported hardware can be risky, especially if you have important files and data on your system. In this section, we will provide a step-by-step guide on how to install Windows 11 on unsupported PC without data loss.
Step 1: Backup your files and data.
Before attempting to upgrade to Windows 11, it is crucial to backup your files and data to prevent any potential data loss. You can use Windows Backup and Restore or any other backup tool to create a backup of your important files and data.
Step 2: Check your PC’s compatibility.
Check your PC’s compatibility with Windows 11 by running the PC Health Check app. This app will scan your system and inform you if your PC meets the minimum system requirements for Windows 11.
Step 3: Download the Windows 11 ISO file.
Download the Windows 11 ISO file from Microsoft’s website.
Step 4: Create a bootable USB drive.
Use Rufus or any other tool to create a bootable USB drive with the Windows 11 ISO file.
Step 5: Insert the bootable USB drive and restart your computer.
Insert the bootable USB drive into your computer and restart your system. Your system should automatically boot from the USB drive.
Step 6: Follow the on-screen instructions.
Follow the on-screen instructions to complete the installation process. During the installation process, you will be prompted to choose between a clean install or an upgrade. Choose the upgrade option to keep your existing files and applications.
Step 7: Complete the installation.
Once the installation is complete, you can remove the USB drive and restart your system. You will then be able to use Windows 11 on your unsupported PC without any data loss.
The benefits of upgrading to Windows 11 on unsupported PC without data loss include the ability to keep your important files and data intact and the peace of mind that comes with knowing that your data is safe. However, the risks include possible compatibility issues and the potential for system instability.
It is important to note that before attempting to upgrade to Windows 11 on unsupported PC without data loss, you should ensure that your system meets the minimum system requirements for Windows 11. Additionally, you should create a backup of your important files and data to prevent data loss in case of any issues during the upgrade process.
X. More easy ways to upgrade to Windows 11 on unsupported hardware
Aside from the methods we have discussed earlier, there are other easy ways to upgrade to Windows 11 on unsupported hardware. Here are some additional methods:
Using the Windows Insider Program
The Windows Insider Program allows users to test new Windows features, including Windows 11. By enrolling in the program, you can upgrade to Windows 11 on unsupported hardware. However, this method may come with some risks as the Insider Preview builds may have bugs and other issues. You can learn more about the Windows Insider Program and how to enroll on Microsoft’s website.
Using third-party tools
There are several third-party tools available that claim to enable Windows 11 on unsupported hardware. These tools work by bypassing the system compatibility check and modifying the Windows Registry. However, using third-party tools may come with risks such as data loss, system instability, and potential security issues. Use these tools at your own risk.
Here are some links to relevant guides/resources:
Windows Insider Program: https://insider.windows.com/en-us/
Windows 11 Compatibility Checker: https://www.microsoft.com/en-us/windows/windows-11#pchealthcheck
Third-party tools: A quick internet search can provide a list of third-party tools available for Windows 11 upgrade on unsupported hardware. However, we recommend caution when using these tools and advise thorough research before proceeding.
To summarize, upgrading to Windows 11 on unsupported hardware can be risky, and it is important to weigh the benefits and risks before attempting any of the methods discussed. Ensure that you have a backup of your important files and data before proceeding with any upgrade method. Additionally, always check your PC’s compatibility with Windows 11 and ensure that your system meets the minimum system requirements.
XI. Upgrade Windows 10 to Windows 11 on unsupported hardware
If you are currently running Windows 10 on unsupported hardware, you may be wondering if it is possible to upgrade to Windows 11. The good news is that upgrading from Windows 10 to Windows 11 on unsupported hardware is possible. In this section, we will discuss the steps to upgrade Windows 10 to Windows 11 on unsupported hardware and the benefits and risks of doing so.
Step 1: Check your PC’s compatibility.
Before upgrading to Windows 11, it is important to check your PC’s compatibility. You can do this by running the PC Health Check app provided by Microsoft. The app will scan your system and let you know if your PC meets the minimum system requirements for Windows 11.
Step 2: Download the Windows 11 ISO file.
Download the Windows 11 ISO file from Microsoft’s website.
Step 3: Create a bootable USB drive.
Use Rufus or any other tool to create a bootable USB drive with the Windows 11 ISO file.
Step 4: Insert the bootable USB drive and run the setup.
Insert the bootable USB drive into your PC and run the setup. During the installation process, you will be prompted to choose between a clean install or an upgrade. Choose the upgrade option to keep your existing files and applications.
Step 5: Follow the on-screen instructions.
Follow the on-screen instructions to complete the installation process. Once the installation is complete, you will be able to use Windows 11 on your unsupported hardware.
The benefits of upgrading from Windows 10 to Windows 11 on unsupported hardware include access to new features, enhanced security, and improved performance. However, the risks include potential compatibility issues and the potential for system instability.
It is important to note that not all Windows 10 systems will be able to upgrade to Windows 11. Therefore, it is crucial to check your system’s compatibility before attempting to upgrade. Additionally, ensure that you have a backup of your important files and data to prevent any data loss during the upgrade process.
To conclude this section, upgrading from Windows 10 to Windows 11 on unsupported hardware is possible. However, it is important to understand the benefits and risks before attempting the upgrade. Always check your system’s compatibility and ensure that you have a backup of your important files and data before proceeding.
XII. Should I upgrade to Windows 11 on unsupported hardware?
Upgrading to Windows 11 on unsupported hardware may seem like an appealing option, but it is important to carefully consider the factors before making the decision. In this section, we will discuss the benefits and risks of upgrading to Windows 11 on unsupported hardware, and the factors to consider when deciding whether to upgrade.
Benefits of upgrading to Windows 11 on unsupported hardware:
- Access to new features and improvements.
- Improved performance and security.
- Compatibility with new software and applications.
Risks of upgrading to Windows 11 on unsupported hardware:
- Potential compatibility issues.
- Risk of data loss or corruption.
- Potential system instability or performance issues.
Factors to consider when deciding whether to upgrade to Windows 11 on unsupported hardware:
Compatibility: Check if your system meets the minimum system requirements for Windows 11.
Performance: Consider whether your hardware can handle the demands of Windows 11 and whether upgrading will improve or degrade your system’s performance.
Data and file backups: Ensure that you have a backup of your important files and data before attempting to upgrade to prevent any data loss or corruption.
Security: Consider the security implications of upgrading and whether it will leave your system vulnerable to security threats.
In summary, upgrading to Windows 11 on unsupported hardware comes with both benefits and risks. It is important to consider the factors discussed above before making the decision to upgrade. Ensure that your system is compatible, back up your important files and data, and be prepared for potential compatibility issues or system instability. Always weigh the benefits and risks before proceeding with the upgrade.
XIII. Conclusion – Install Windows 11 on unsupported hardware
In this article, we discussed various methods for upgrading to Windows 11 on unsupported hardware, including upgrading from Windows 10 to Windows 11, upgrading using ISO, Rufus, and Registry methods, and upgrading without data loss. We also discussed the benefits and risks of upgrading to Windows 11 on unsupported hardware and the factors to consider when making the decision.
To recap, upgrading to Windows 11 on unsupported hardware can be risky and may come with potential compatibility issues, data loss, and system instability. However, it also comes with benefits such as improved performance, access to new features, and enhanced security. It is crucial to carefully consider the factors and weigh the benefits and risks before proceeding with the upgrade.
Our final thoughts and recommendations include:
Always check your system’s compatibility before attempting to upgrade to Windows 11.
Ensure that you have a backup of your important files and data to prevent any potential data loss.
Be prepared for potential compatibility issues or system instability after the upgrade.
Use caution when using third-party tools to upgrade to Windows 11 on unsupported hardware.
Always consider the benefits and risks before making the decision to upgrade.
In conclusion, upgrading to Windows 11 on unsupported hardware can be a challenging task, but with careful consideration and the right approach, it is possible. We hope that this article has provided useful information and guidance on how to upgrade to Windows 11 on unsupported hardware.
Related Posts: