Using Hyper V on Windows 10 (2 easy methods)
This article shows using Hyper V on Windows 10 Pro or (home), how to create a virtual machine using Hyper V on Windows 10 and also how to disable Hyper V Windows 10.
Using Hyper V on Windows 10 pro
Step 1: To launch Hyper-V Manager: Go Start > Start Menu > Windows Administrative Tools > Hyper-V Manager
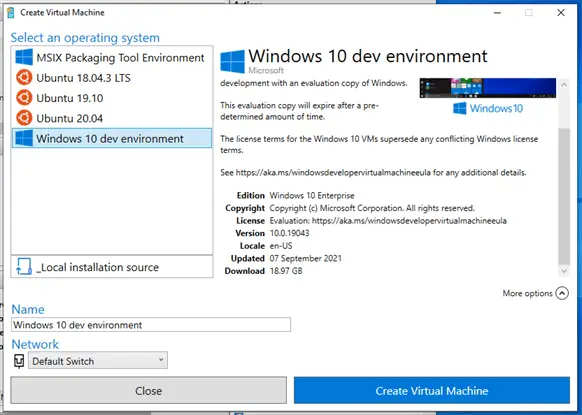
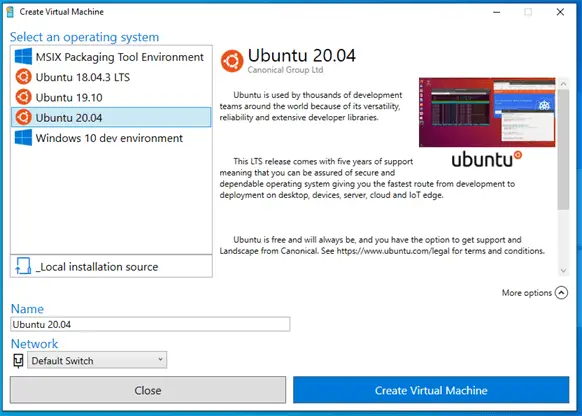
Step 2: From the Actions Menu click Quick Create to start creating your Virtual Machine. You can choose from the available operating systems of Windows 10 or Ubuntu Linux; or you can use local installation source, which can be Windows Server 2019 or Windows 7, whatever you like.
Step 3:
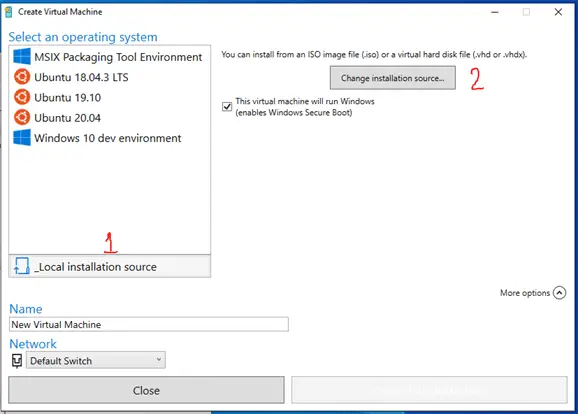
- Select Local Installation Source
- Change the Installation Source ie could CD/DVD or ISO image.
- If you’re installing a Windows OS, then tick the checkbox marked “This Virtual Machine will run Windows (enables Windows Secure Boot)“
- If you’re installing Linux or anything not Windows, then untick this checkbox.
Step 4:
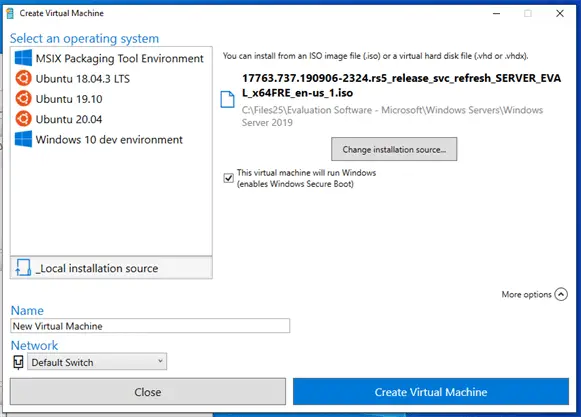
After selecting your ISO image to install from, the Create Virtual Machine button becomes active for you to click and start creating your virtual machine.
Using Hyper V on Windows 10 home
By default, Windows 10 home OS doesn’t include the Hyper-V role feature. However, it’ is possible to enable Hyper-V by running a script that will download the Hyper-V package to your standard Windows 10 Home edition, and thus give you the ability to create and manage VM. A detailed guide of how to create and run this Hyper-V script are available here How to get Hyper-V on Windows 10 Home.
Once Hyper-V is enabled on your Windows 10 home PC, you now the capability to create virtual machines and manage them following exactly the same steps described on Using Hyper V on Windows 10 Pro above.
A second method of creating virtual machines is also described below under How to create a virtual machine in Windows 10.
How to create a virtual machine in Windows 10
- Start > Start Menu > Windows Administrative Tools > Hyper-V Manager
Step 1:
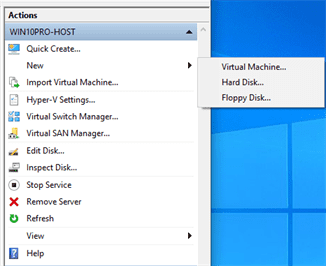
From the Actions click on New > Virtual Machine
You’re then taken through a series of New Virtual Machine Wizard Pages that help you configure your virtual machine at the point of creation. You can always configure new settings through Hyper-V manager.
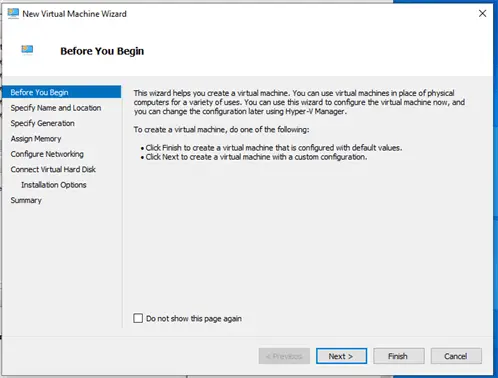
Before you Begin – New Virtual Machine Wizard Page 1
Step 2:
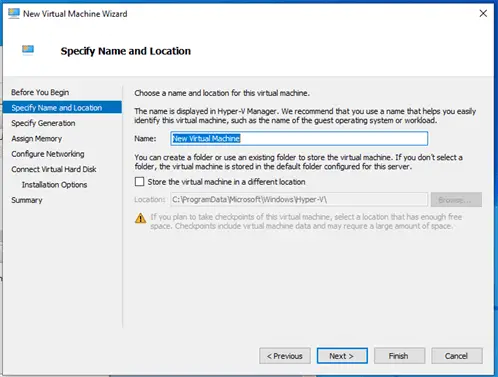
Specify VM Name and Location – New Virtual Machine Wizard Page 2
Step 3:
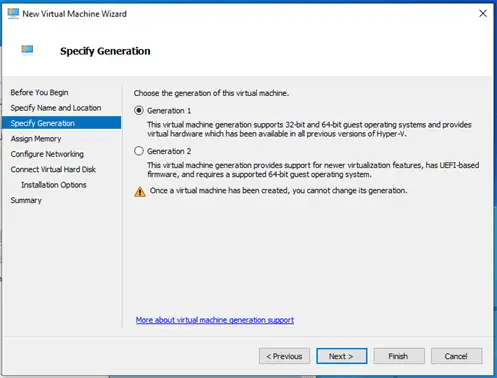
Specify Generation 1 or Generation 2 – New Virtual Machine Wizard Page 3
Step 4:
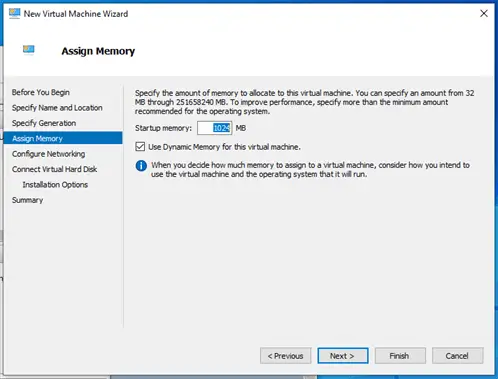
Assign Memory – New Virtual Machine Wizard Page 4
Step 5:
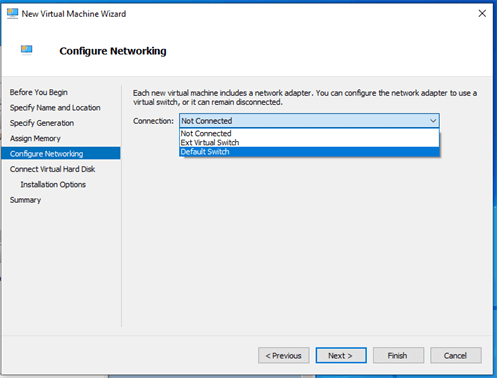
Configure Networking – New Virtual Machine Wizard Page 5
Step 6:
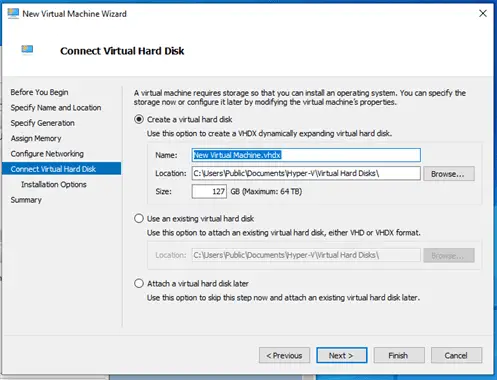
Connect Virtual Hard Disk – New Virtual Machine Wizard Page 6
Step 7:
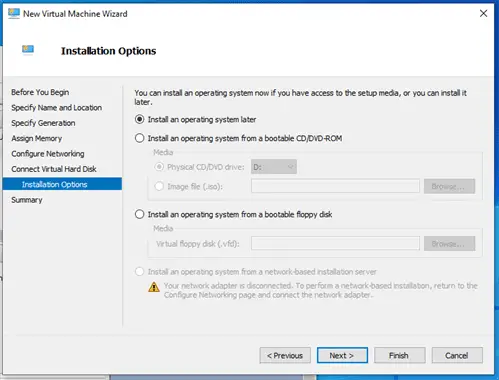
Installation Options – New Virtual Machine Wizard Page 7
Step 8:
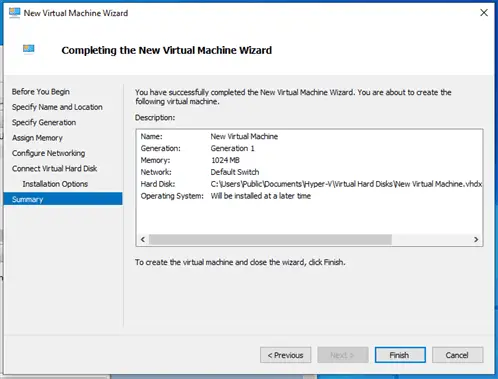
Completing the New Virtual Machine Wizard – New Virtual Machine Wizard Page 8
Windows 10 built in virtual machine
Windows 10 Pro, Windows 10 Enterprise and Windows 10 Education all come with built-in Hyper V feature that enables you to create and manage Virtual Machines.
This is very useful because it provides you with the ability to test apps before they are deployed in a production environment.
Best of all you don’t have to fork out loads of money to buy a physical computer to test out any apps.
How to create a virtual machine using Hyper V on Windows 10
If you want to know how to create a Hyper-V virtual machine in Windows 10, or how to create a virtual machine with Hyper V, we assume your PC already has Hyper-V role enabled.
You can follow the step-by-step process described above on How to create a virtual machine in Windows 10.
How to install ubuntu linux using Hyper-V on Windows 10
- Start > Start Menu > Windows Administrative Tools > Hyper-V Quick Create
How to create a virtual machine with Hyper V
Method 1:
- Start > Start Menu > Windows Administrative Tools > Hyper-V Quick Create
- This method is described in full here
Method 2:
- Start > Start Menu > Windows Administrative Tools > Hyper-V Manager
- This method is described fully here
Disable Hyper V Windows 10
If you want to test out other virtualization applications such as VMware Workstation or VirtualBox, you’re advised to disable Hyper-V hypervisor.
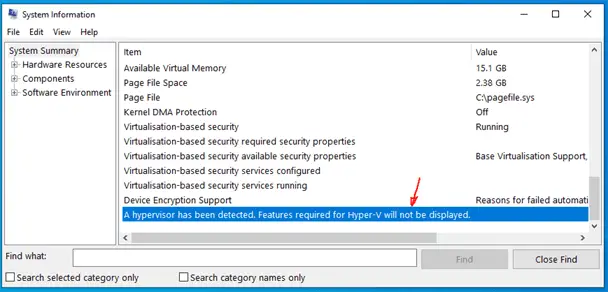
To check if Hyper-V hypervisor is running on your PC, take a look at the System Information report summary. Sroll down to the bottom of the report and look for ” a hypervisor has been detected. Features required for Hyper-V will not be displayed. ” This confirms that indeed Hyper-V hypervisor in enabled and running. And you want to disable it.
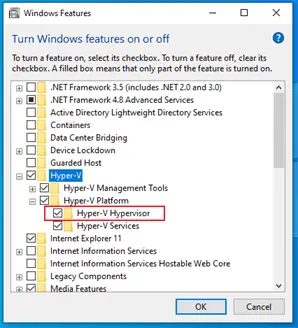
Disable Hyper V Windows 10 using Control Panel’s Turn Windows Features On or Off.
Step 1: Type “ Turn Windows Features On or Off ” In the Search Field on taskbar.
Step 2: Open best match which should be ” Turn Windows Features On or Off “
Step 3: Locate ” Hyper-V ” tree and drill down to > Hyper-V Platform > Hyper-V hypervisor
Step 4: Untick Hyper-V hypervisor to deselect it.
Step 5: Click OK and Restart your PC.
Disable Hyper V Windows 10 using PowerShell
Step 1: Click Start to locate Windows PowerShell on the Start Menu.
Step 2: Right-Click on Windows PowerShell and Choose Run as Administrator.
Step 3: Type ” Disable-WindowsOptionalFeature -Online -FeatureName Microsoft-Hyper-V-Hypervisor “
Step 4: Reboot PC.
Related Posts:
Further Reading can be found here