Windows 10 Automatic Repair Tool: Fix Your PC Without the Hassle
Is your Windows 10 automatic repair tool stuck in a loop?
You’re not alone.
Thousands of users face the frustrating automatic repair loop where their PC just won’t boot properly.
But here’s the good news — fixing it doesn’t need to be complicated.
I’m breaking down simple and proven solutions to get your PC up and running.
Stick with me. I’ll explain why this issue happens and exactly how to troubleshoot it, step by step.
Let’s get your PC back in business!
What is the Windows 10 Automatic Repair Tool?

The Windows 10 automatic repair tool is a built-in feature designed to troubleshoot boot issues.
When your PC fails to start, Windows 10 automatically runs the repair tool to resolve the problem.
However, sometimes the tool itself can get stuck, leading to the dreaded automatic repair loop.
In simpler terms, it’s when your system keeps attempting to repair but never actually succeeds.
For more on using tools effectively, check out this guide on how to repair Windows 10 using Command Prompt.
Why Does the Automatic Repair Loop in Windows 10 Happen?
The automatic repair loop in Windows 10 occurs when Windows fails to boot properly.
Here are some common reasons why:
- Corrupted system files
- Missing boot configuration data (BCD)
- Hard drive errors
- Recent Windows updates
- Malware or incompatible software
If any of these issues arise, your PC will struggle to fix itself, leaving you stuck in the loop.
To ensure better recovery options, you might want to create a bootable USB for Windows 10.
How to Exit the Windows 10 Automatic Repair Loop

Here are some simple ways to exit the automatic repair loop:
- Restart Your PC: Sometimes, a simple restart can fix the issue.
- Access Advanced Options:
- Press and hold the power button to force a shutdown.
- Turn your PC back on.
- Repeat this 3-4 times to trigger Advanced Startup Options.
- Use Startup Repair:
- Go to Advanced Options > Troubleshoot > Startup Repair.
If these quick fixes don’t work, move on to more detailed troubleshooting.
Learn more about boot issues by exploring how to restart Windows Explorer.
How to Use Safe Mode to Fix the Automatic Repair Tool Issue
Safe Mode allows you to boot your PC with only essential system files.
Here’s how to access it:
- Force your PC to restart 3-4 times to trigger Advanced Startup.
- Go to Troubleshoot > Advanced Options > Startup Settings.
- Press F4 or F5 to boot into Safe Mode.
Once in Safe Mode:
- Run a System Restore.
- Uninstall any recent updates or incompatible drivers.
- Check for malware using trusted tools.
This process helps identify and resolve issues that prevent normal booting.
For additional support with Safe Mode and advanced repairs, see this article on how to protect your online privacy.
Using Command Prompt to Resolve Automatic Repair Problems

Command Prompt is a powerful tool for manual troubleshooting.
To access it:
- Go to Advanced Options > Command Prompt.
- Use the following commands:
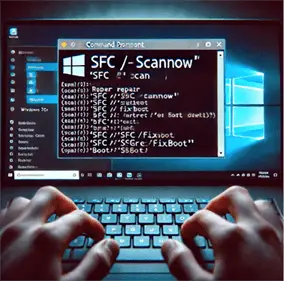
- sfc /scannow: Scans and repairs corrupted system files.
- bootrec /fixmbr: Fixes the Master Boot Record.
- bootrec /fixboot: Repairs boot sectors.
- bootrec /scanos: Scans for operating systems.
- bootrec /rebuildbcd: Rebuilds the Boot Configuration Data.
Each of these commands addresses different boot problems and helps exit the automatic repair loop.
For related troubleshooting tools, check out this guide on command prompt shortcuts.
Perform a System Restore to Fix Startup Repair Issues
System Restore is a quick way to roll back your system to a previous state.
Steps to perform System Restore:
- Boot into Advanced Options > Troubleshoot > System Restore.
- Choose a restore point from before the issue occurred.
- Follow the prompts to complete the restoration.
This method can undo recent changes like faulty updates or driver installations.
For system optimization tips, check out how to clear cache in Windows 10 PC.
Check for Corrupted System Files Using SFC and DISM
If corrupted system files are causing boot issues, use SFC (System File Checker) and DISM (Deployment Image Servicing and Management).
Steps to run SFC and DISM:
- Access Command Prompt from Advanced Options.
- Run the following commands:
sfc /scannowdism /online /cleanup-image /restorehealth
SFC fixes immediate file issues, while DISM repairs the system image if SFC fails.
How to Use the CHKDSK Tool for Hard Drive Errors
Hard drive errors can trigger the automatic repair loop.
The CHKDSK tool scans for bad sectors and repairs them.
Here’s how to use it:
- Access Command Prompt.
- Run the command:
chkdsk /f /r. - Press Enter.
CHKDSK will scan and repair your hard drive, which often resolves boot problems.
If you experience frequent hard drive errors, consider learning how to check if I have been hacked.
Bootable USB: A Solution for Automatic Repair Problems
If nothing works, creating a bootable USB might be your solution.
Steps to create and use a bootable USB:
- Download the Windows 10 installation media from Microsoft.
- Use the tool to create a bootable USB drive.
- Insert the USB and boot your device.
- Choose Repair Your PC > Advanced Options > Startup Repair.
This bypasses the loop and lets you troubleshoot directly.
Need help? Follow this step-by-step guide to create a bootable USB for Windows 10.
Preventing the Automatic Repair Loop in the Future
To avoid getting stuck in the automatic repair loop again, follow these tips:
- Keep your system updated: Install the latest Windows updates.
- Run regular scans: Check for malware and corrupted files.
- Back up your data: Use System Restore points or external backups.
- Monitor your hard drive health: Use tools like CHKDSK regularly.
- Avoid force shutdowns: Sudden power loss can corrupt system files.
Taking these steps ensures a smooth and reliable Windows 10 experience.
For related tools, learn about Windows recovery USB.
Summary: Key Takeaways
- Windows 10 automatic repair tool is designed to fix boot issues but can sometimes get stuck in a loop.
- Common causes include corrupted files, BCD errors, or hard drive issues.
- Fix the issue by:
- Restarting and using Advanced Options.
- Booting into Safe Mode.
- Running Command Prompt commands like SFC and CHKDSK.
- Performing a System Restore.
- Using a bootable USB for recovery.
- Prevent future issues by updating Windows, running regular scans, and backing up your system.
By following these steps, you can resolve the automatic repair loop and keep your PC running smoothly.
Say goodbye to endless repair cycles and get back to what matters most!
FAQS – Windows 10 Automatic Repair Tool
How do I get to automatic repair in Windows 10?
To trigger the Automatic Repair in Windows 10:
Force shutdown your PC by pressing and holding the Power button until it turns off.
Repeat this process 3 times (turning it back on after each shutdown).
On the third restart, Windows will launch the Automatic Repair screen.
Source: Microsoft Support – Windows Startup Settings.
Does Windows 10 have a built-in repair tool?
Yes, Windows 10 includes a built-in repair tool called Automatic Repair. It attempts to diagnose and resolve boot-related issues automatically when your PC fails to boot correctly. You can also access additional tools like Startup Repair, System Restore, and Command Prompt through the Advanced Startup Options menu.
Source: Microsoft Support – Recovery Options in Windows 10.
How do I enter Windows 10 repair mode?
You can enter Windows 10 Repair Mode by:
- Restarting your PC and interrupting the boot process 3 times (force shutdown with the Power button).When the Automatic Repair screen appears, select Advanced Options.Navigate to Troubleshoot > Advanced Options to access repair tools like Startup Repair and Safe Mode.
Alternatively, you can boot into repair mode with a bootable USB or installation media.Source: Microsoft Support – Advanced Startup Options.
Is there a Windows 10 update repair tool?
Yes, Windows 10 includes the Windows Update Troubleshooter, a built-in tool designed to diagnose and fix issues related to Windows Updates.
To use it:
Go to Settings > Update & Security > Troubleshoot > Additional Troubleshooters.
Select Windows Update and run the troubleshooter.
If the issue persists, consider using tools like DISM or SFC via Command Prompt to repair system files related to updates.
Source: Microsoft Support – Fix Windows Update Errors.


