Windows 11 Clean Install Tutorial: Step-by-Step Guide to a Fresh Start
Windows 11 clean install tutorial
Introduction
Ever wondered how to get a clean install of Windows 11 that works flawlessly? Whether you’re starting fresh or fixing a sluggish system, this is the guide for you. Installing Windows 11 might seem intimidating, but I promise, it’s easier than you think.
Here’s the deal: If you follow this step-by-step tutorial, you’ll be running a brand-new, lightning-fast version of Windows 11 in no time. Stick with me, and I’ll walk you through every click, ensuring you avoid common pitfalls.
1. What Is a Clean Install of Windows 11?
A clean install means wiping your PC’s hard drive and installing a fresh copy of Windows 11. It’s like hitting the reset button on your system.
This process removes:
- Old files and software.
- Viruses or malware.
- Unnecessary clutter slowing your PC.
Why it’s awesome: It’s the best way to ensure a smooth, trouble-free experience with Windows 11.
2. Why Should You Perform a Clean Install of Windows 11?
Here’s why you might need a clean installation of Windows 11:
- Your PC is running slow.
- You’ve upgraded hardware like a new SSD.
- To fix issues after a botched upgrade from Windows 10.
- You want a fresh start without leftover bloatware.
Think of it as spring cleaning for your PC. For tips on optimizing your PC, check out how to clear cache on laptop.
3. Requirements for Installing Windows 11
Before diving in, check these prerequisites:
- A PC compatible with Windows 11 (meet the TPM 2.0 and Secure Boot requirements).
- A bootable USB drive with at least 8GB of storage.
- A stable internet connection (optional but helpful).
- Your Windows 11 product key (or a digital license linked to your Microsoft account).
Pro tip: If your device doesn’t meet the official requirements, learn how to install Windows 11 on unsupported hardware.
4. How to Create a Bootable USB for Windows 11 Installation
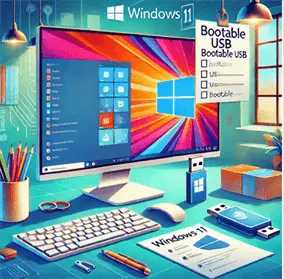
Follow these steps to make a bootable USB:
- Download the Media Creation Tool from Microsoft’s official site.
- Insert a USB drive (minimum 8GB).
- Run the tool and select “Create installation media.”
- Choose your language, edition of Windows, and architecture.
- Select the USB drive option and let the tool do its magic.
For a detailed guide, check out how to create a Rufus Windows 11 bootable USB drive.
Now you have a ready-to-go installation media!
5. Backing Up Your Files Before Installation
A clean install wipes everything, so back up important files:
- Use OneDrive or an external drive to save documents, photos, and videos.
- Sync settings and browser data if using Microsoft Edge.
- Take note of apps you need to reinstall.
Skipping this step is risky—don’t say I didn’t warn you.
6. How to Set Up Your PC for Booting From a USB Drive
Here’s how to adjust your PC’s boot order:
- Insert the bootable USB.
- Restart your PC and enter BIOS/UEFI settings (usually by pressing F2, F10, or Delete during startup).
- Locate the boot order menu.
- Set the USB drive as the primary boot device.
- Save and exit.
Your PC will now boot from the USB and launch the Windows 11 setup.
7. Step-by-Step Guide to a Clean Installation of Windows 11
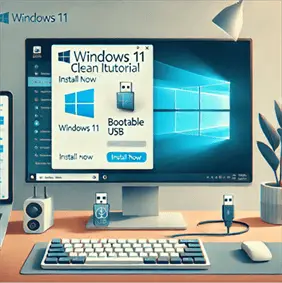
Ready to install Windows 11? Follow these steps:
- Plug in the bootable USB and restart your PC.
- When prompted, press any key to boot from USB.
- Choose your language, time format, and keyboard input.
- Click “Install Now.”
- Enter your product key or select “I don’t have a product key.”
- Choose your edition of Windows (e.g., Windows 11 Pro).
- Select “Custom Installation.”
- Delete all partitions on “Drive 0” and create a new partition.
- Choose the new partition for installation and click “Next.”
The installation process will now begin. Sit tight and let it do its thing.
8. Setting Up Windows 11 After Installation
Once the installation is complete, you’ll see the setup screen. Here’s what to do:
- Sign in with your Microsoft account to sync settings and files.
- Set up privacy settings according to your preferences.
- Install essential updates using Windows Update.
- Download your apps from the Microsoft Store or other trusted sources.
To ensure your new system stays secure, check out best free antivirus for Windows 11.
Optional: Link your digital license to your Microsoft account for easier reactivation in the future. For added security, you can also explore what is VPN and how does it work.
9. Troubleshooting Common Installation Issues
If something goes wrong, here’s how to fix it:
- Error: “This PC can’t run Windows 11”
- Ensure Secure Boot and TPM are enabled in BIOS.
- Can’t boot from USB
- Double-check the bootable USB was created properly. Learn more about troubleshooting boot issues in preparing automatic repair in Windows 10.
- Activation issues
- Verify your product key or ensure your license is linked to your Microsoft account.
10. FAQs About Windows 11 Clean Installation
Q: Can I install Windows 11 without a Microsoft account? A: Yes, but you’ll lose features like syncing and Microsoft 365 integration.
Q: Do I need a product key for a clean install? A: If your license is linked to your Microsoft account, you can skip entering a key.
Q: How long does the installation take? A: Usually 30-60 minutes, depending on your PC.
Key Takeaways
- Backup your data before starting.
- Use the Media Creation Tool to create a bootable USB.
- Follow the steps for a smooth installation process.
- Link your digital license to a Microsoft account.
- Enable Secure Boot and TPM for compatibility.
Performing a clean install of Windows 11 doesn’t have to be stressful. With this guide, you’re fully equipped to start fresh and enjoy the latest features Microsoft has to offer.
FAQs – Windows 11 clean install tutorial
What is the best way to clean install Windows 11?
The best way to perform a clean install of Windows 11 involves creating a bootable USB drive using the official Media Creation Tool from Microsoft. Here are the steps:
Download the Media Creation Tool from the official Microsoft website.
Create a bootable USB drive with at least 8GB of storage.
Adjust your PC’s BIOS settings to boot from the USB drive.
Follow the on-screen prompts to delete existing partitions and install a fresh copy of Windows 11.
After installation, set up your Microsoft account and customize settings.
This method ensures the installation is clean and error-free, providing optimal performance and compatibility.
Does clean install of Windows 11 erase everything?
Yes, a clean install erases everything on your PC’s hard drive, including:
Personal files
Installed applications
System settings
Important: Back up all your essential data before starting the process. Use an external storage device or cloud-based services like OneDrive to ensure you don’t lose important files. Once the clean installation is complete, you can restore your data and reinstall necessary software.
Source: Microsoft Support Documentation.
How to install Windows 11 operating system step by step?
Here’s a detailed step-by-step guide to install Windows 11:
Prepare Installation Media:
Use the Media Creation Tool to create a bootable USB drive.
Backup Data:
Save your important files to an external drive or cloud storage.
Configure BIOS/UEFI:
Restart your PC and enter BIOS by pressing F2, F10, or Delete during startup.
Set the USB drive as the primary boot device.
Begin Installation:
Insert the bootable USB and restart your PC.
Follow prompts to choose your language, time, and input method.
Custom Install:
Select “Custom: Install Windows only” to perform a clean installation.
Delete all existing partitions and create a new one.
Complete Installation:
Follow on-screen instructions to complete the setup, including setting up your Microsoft account and preferences.
Source: Microsoft Installation Guide.
How do I completely clean up Windows 11?
To clean up Windows 11, you can either perform a clean installation or use built-in tools for maintenance. Here’s how to clean up your system without reinstalling:
Use Disk Cleanup:
Search for “Disk Cleanup” in the Start menu.
Select the drive to clean and remove unnecessary files.
Uninstall Unused Apps:
Go to Settings > Apps > Apps & Features.
Uninstall apps you no longer need.
Clear Cache and Temporary Files:
Use the Storage Sense feature in Settings > System > Storage to automatically delete temporary files.
Optimize Storage:
Enable OneDrive Files On-Demand to free up local space.
Move large files to an external drive or cloud storage.
Advanced Maintenance:
Reset your PC via Settings > System > Recovery > Reset This PC.
For a thorough reset, consider a clean installation as detailed earlier.
Source: Microsoft Documentation on Disk Cleanup and Maintenance.

